| Username existing |
To avoid the existence of username, please use the email name for
registration |
| Installer Code |
If the end-user does not know the installer code, please leave it blank
and go on or contact your installation company |
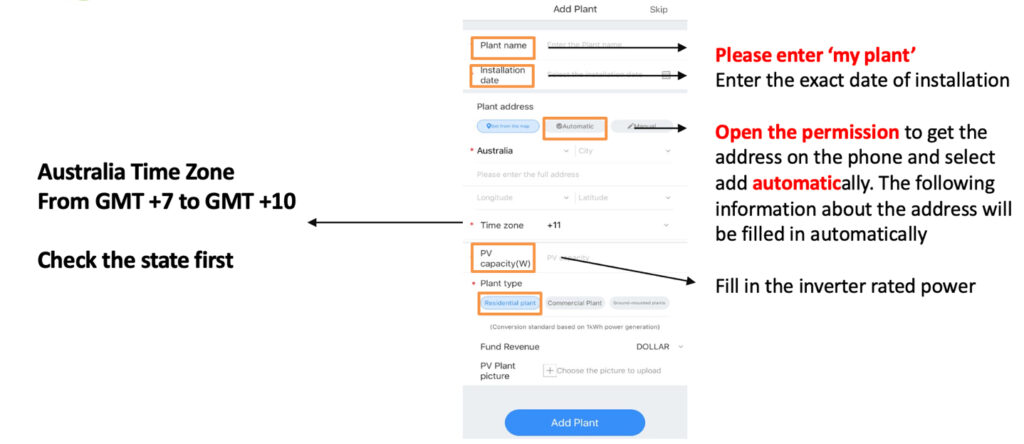
| PV capacity |
Please input the capacity of the solar panels designed, please contact your installation company for the design. |
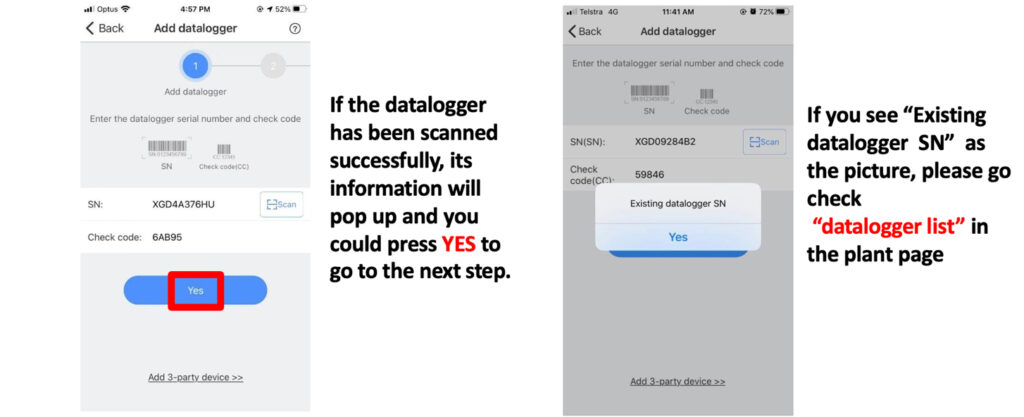
| Datalogger already exist Existing datalogger |
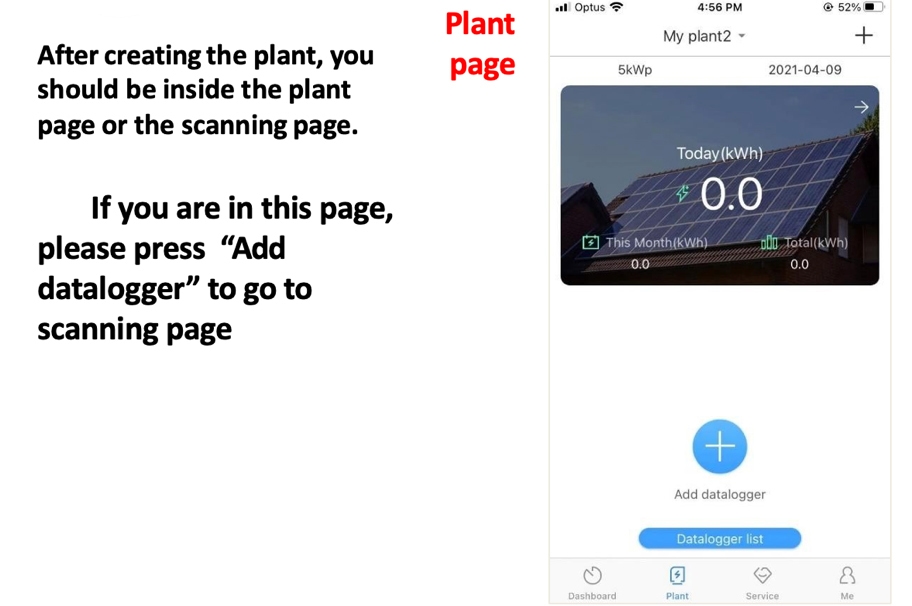
Please go to ‘Plant’ on Shinephone and find ‘Datalogger List’
Click and hold the datalogger that you added before.
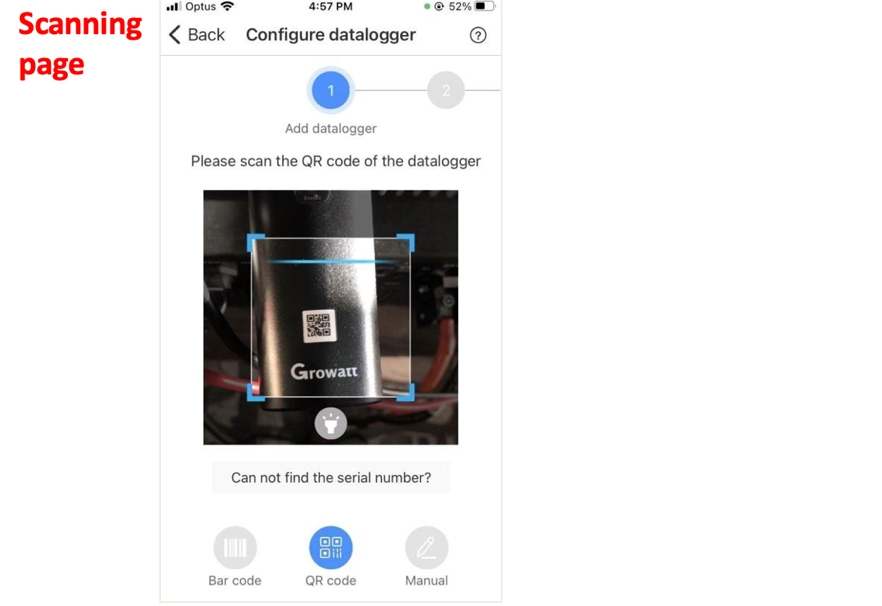
Click on the ‘Configure datalogger’ and do the configuration again
If there is no datalogger there, please contact Growatt |
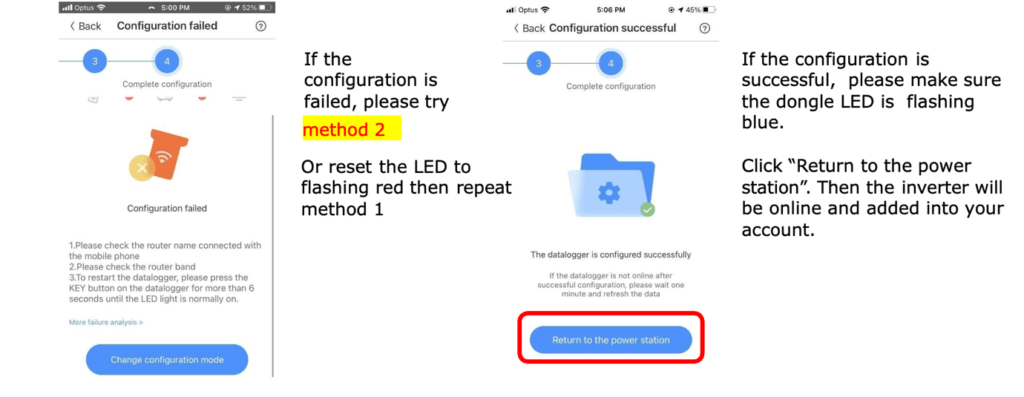
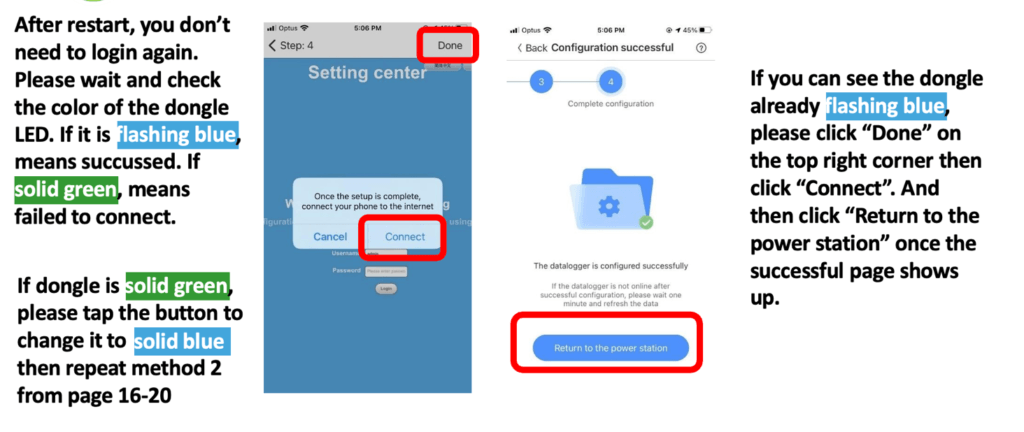
| After configuration in Shinephone, the dongle’s light is not flashing blueor solid green |
Please reset the dongle to flashing red and do the configuration again. |
| Blue flashing on dongle, no data on Shinephone App |
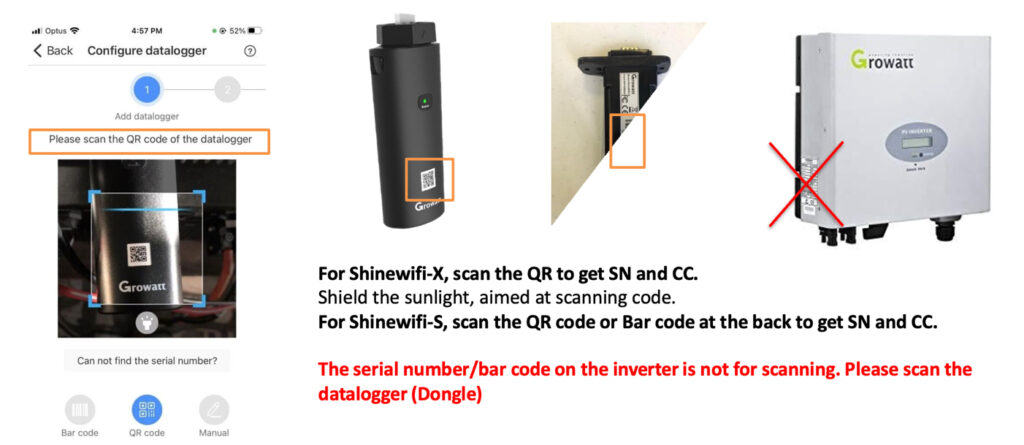
Please go to ‘Plant’ on Shinephone and click ‘add datalogger’ and scan the code on dongle again. |
| Dongle is solid green light |
Dongle failed to connect to Wi-Fi
1.Wi-Fi is not 2.4 GHz
or 2. Enter wrong Wi-Fi name or password when using AP mode
or 3. Wi-Fi signal is weak
|
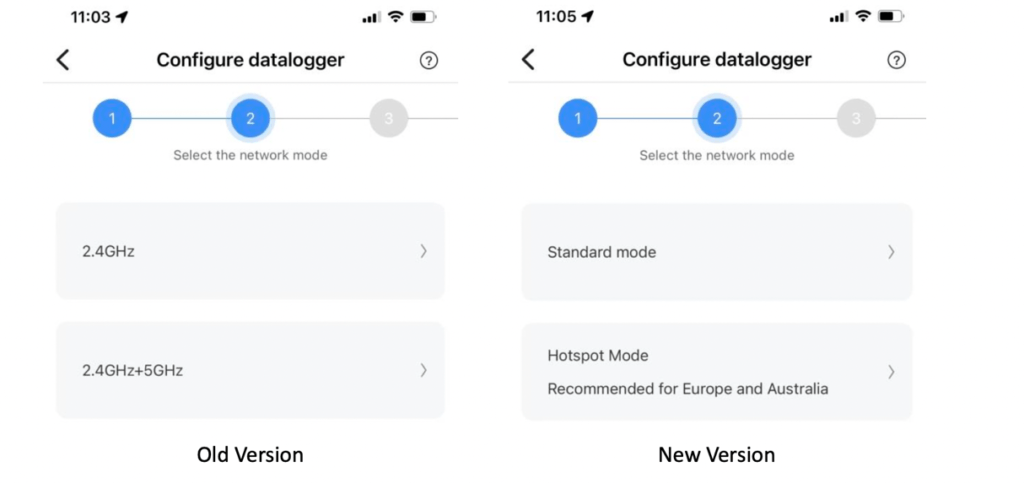
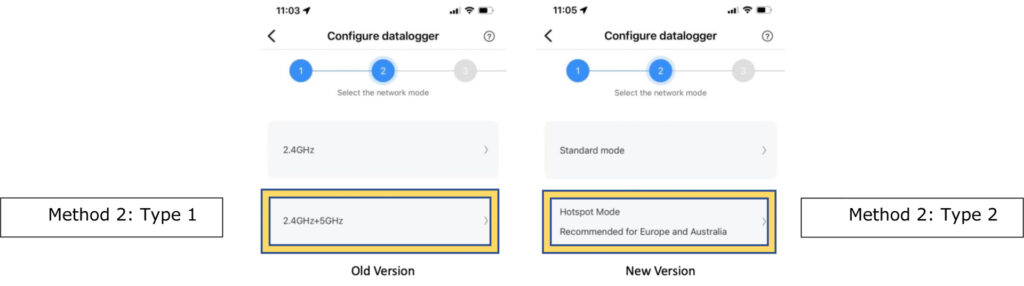
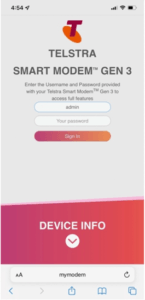
| Wi-Fi is not 2.4 GHz |
- Check from the inbuilt IP page of router and disable 5Ghz
- Contact internet supplier to change the WIFI to 2.4 Ghz
- Or use Shinelink/Shinelink-X
|
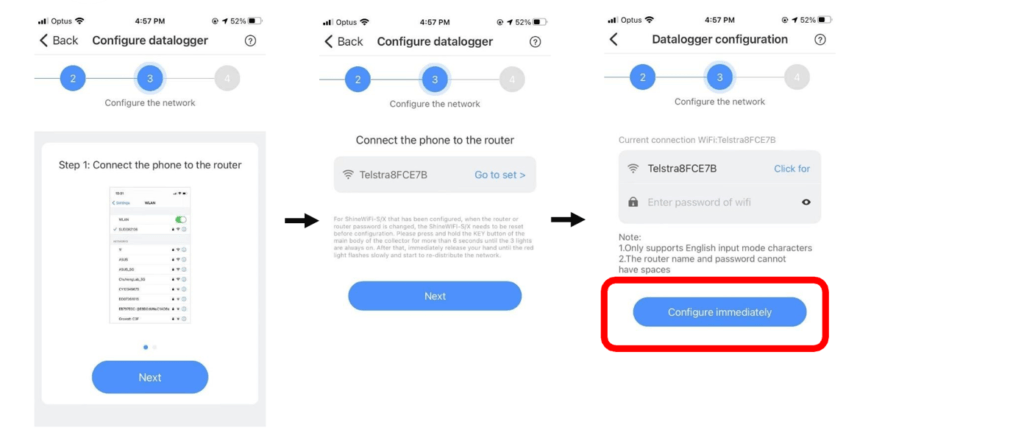
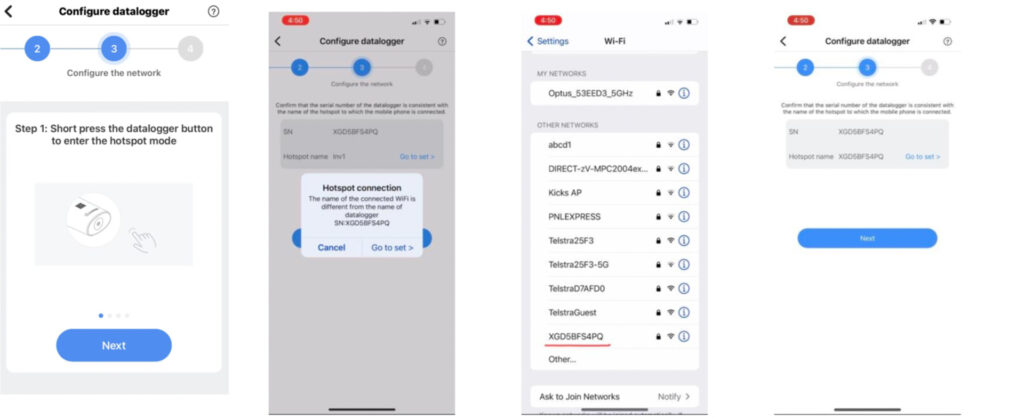
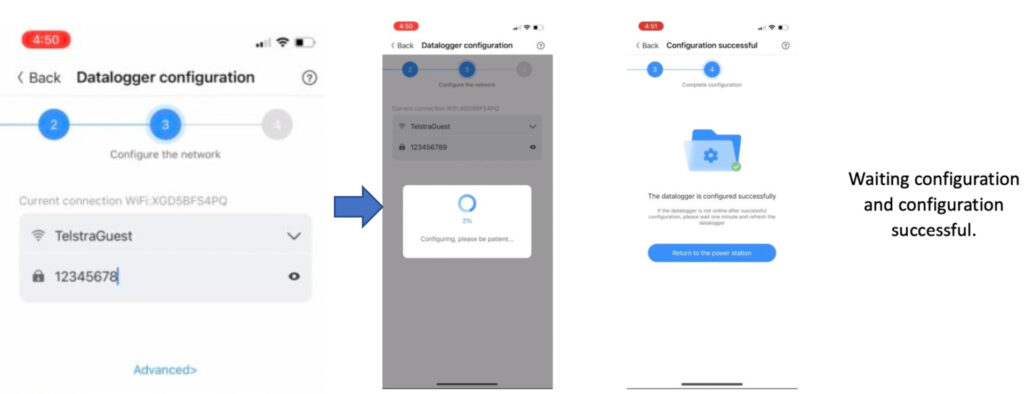
| Verify WIFI name and password |
Forget the home WIFI connection from mobile phone.
Use the same WIFI password entered in the AP mode method, re-do the WIFI connection on mobile phone.
Check to see if the password is correct |
| Wi-Fi signal too weak |
Please check the distance between router and inverter. Please add an WIFI extender if necessary. |
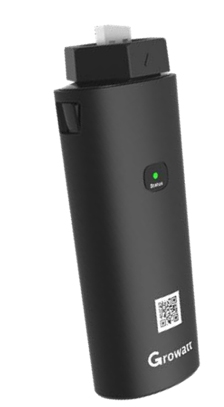
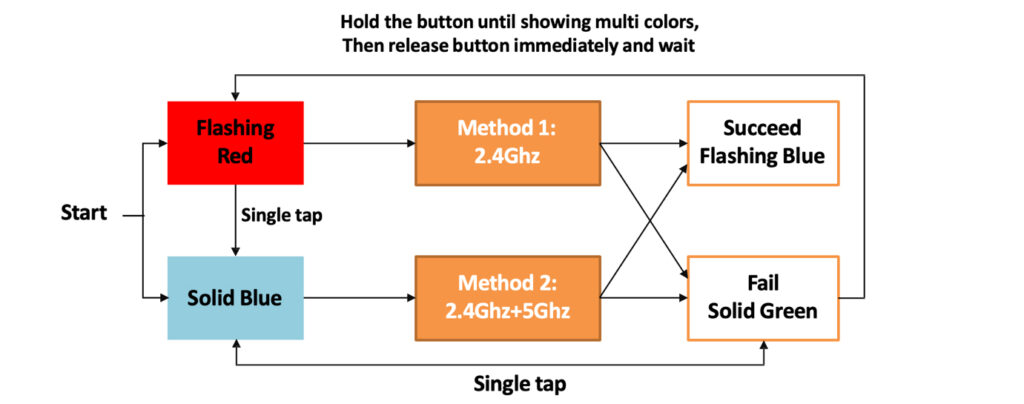
| How to reset the dongle |
Hold the button until it shows multiple colours and then release. After that the light should change to flashing red in a minute. |
| Dongle cannot change to Flashing Red |
After reset, if it changes to solid blue instead of red, please single tap the button again. |
| Method 2 login page cannot be open |
- Check if the hotspot of dongle is connected to your phone.
- Refresh the page.
|
| Method 2 setting centre cannot be open |
- Check if the hotspot of dongle is connected to your phone.
- Refresh the page.
- Reset the dongle and do again from the beginning
|