Getting Started with the Tesla App
To complete installation of your Powerwall, you must register it to your Tesla Account and connect it to your home Wi-Fi network. To begin registration, download the Tesla app on your phone and sign in with your Tesla Account. If you already own other Tesla vehicle or energy products, register your Powerwall using the same email address.

Step 1: Tap the profile picture in the top right-corner of the app to open the profile menu.
Step 2: Tap ‘Add Product’ > ‘Powerwall.’

Step 3: Follow the prompts to locate and scan your gateway password QR Code.

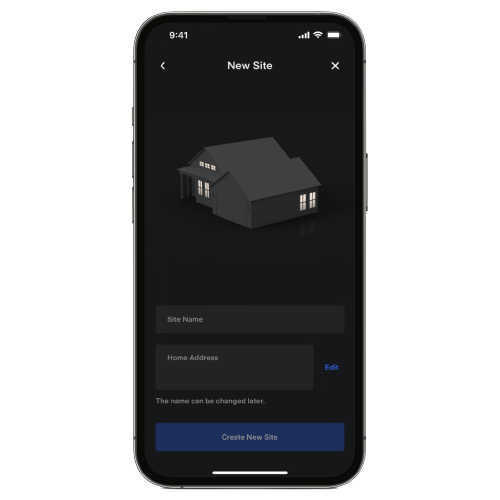
Step 4: Choose a name for your Powerwall and enter your home address. We use your address for location-based Powerwall features, including Storm Watch.

Step 5: Accept the request to join your Powerwall's local "TEG-XXX" Wi-Fi network, where "XXX" are the last three alphanumeric characters of your Gateway serial number. Wait a few minutes for your phone to connect to Wi-Fi.

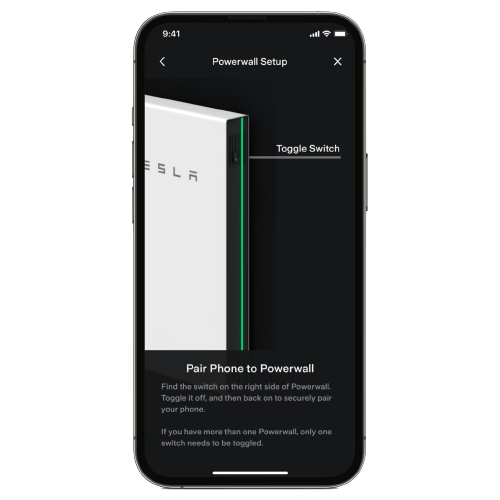
Step 6: Follow the prompts to pair your phone to the Powerwall.

Step 7: Select your home Wi-Fi network and enter your network password.

Step 8: Tap ‘Connect’ to connect your Powerwall to Wi-Fi. For additional information, learn more about connecting your Powerwall to Wi-Fi.
Once connected to your home Wi-Fi, your Powerwall’s power flow and energy data will begin syncing with the Tesla network.
Note: This process may take up to five minutes.
Troubleshooting the Registration Process
If you experience Wi-Fi connection errors
- Confirm that you are selecting the correct Wi-Fi network and have entered your network password correctly.
- Check for and disable any firewall or guest network restriction settings on your network that may be preventing connection.
- Contact your home Wi-Fi service provider for technical support.
If you receive the message: Registration Failed
- Restart your Gateway and Tesla app, and then try the registration process again.
- Contact our Customer Support team if you still receive this error message.
If you receive the message: Check the app later to find your new products
- Log out of the app, wait approximately five minutes and then log back in.
- Contact our Customer Support team if you still receive this error message.
If you receive the message: Product already registered
- Check if this device is already registered to another user.
- Contact our Customer Support team for registration assistance.


